How To
How to Diffuse Curly Hair in 5 Easy Steps
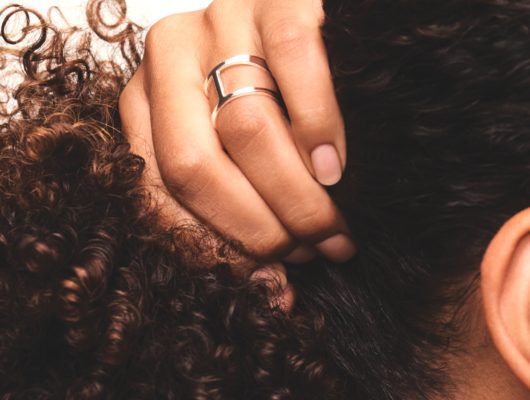
If you have curly hair or wavy hair, you may be well acquainted with a hair diffuser, and if you’re not, we’re about to transform your curl styling routine for the better… If you’re looking for more uniform, less-frizzy, more voluminous curls, a diffuser is the answer. In this guide, we’ll explain how to diffuse wavy hair and curly hair correctly so you can embrace your natural hair texture. From using the right hair products online to knowing how to moisturize curly hair, we’ve got all the advice you need to maintain your luscious locks when diffusing.
How To Diffuse Curly Hair
It doesn’t take a pro stylist to diffuse your hair properly. In fact, diffusing your curls is far easier than giving yourself a smooth blowout. Follow the easy steps below to learn how to use a diffuser on curly hair and achieve frizz-free, ready-to-go curls in no time.
Step 1: Prep Your Hair
After showering, using our guide on how to wash curly hair, get your favorite leave-in products ready to style your hair. Run your favorite styling product through your curls and shape them. We recommend our Curl Enhancer for wavy hair, our Curl Definer for curly hair, and our Curl Elongator for coily hair. All curl products are formulated to provide both conditioning and styling benefits so you can hydrate the hair before you apply heat and help your curls hold their shape.
Next, you need to use a heat protectant spray-always. This is an absolute must when it comes to curly hair tips. We recommend using either our Heat Styling Spray or Restore Instant Protection before diffusing your hair to provide proper thermal protection.
Step 2: Choose the Right Heat Setting
The next step is to get to know your blow dryer and select the right heat setting for your natural hair. Most blow dryers have high, medium, and low settings as well as a “cool” button that blasts hair with cool air instead of heat.
When you diffuse your curls, start with the lowest heat and speed settings and then work your way up as your hair dries as needed. At the roots, use the cool button to infuse your hair with volume.
Step 3: Work In Sections
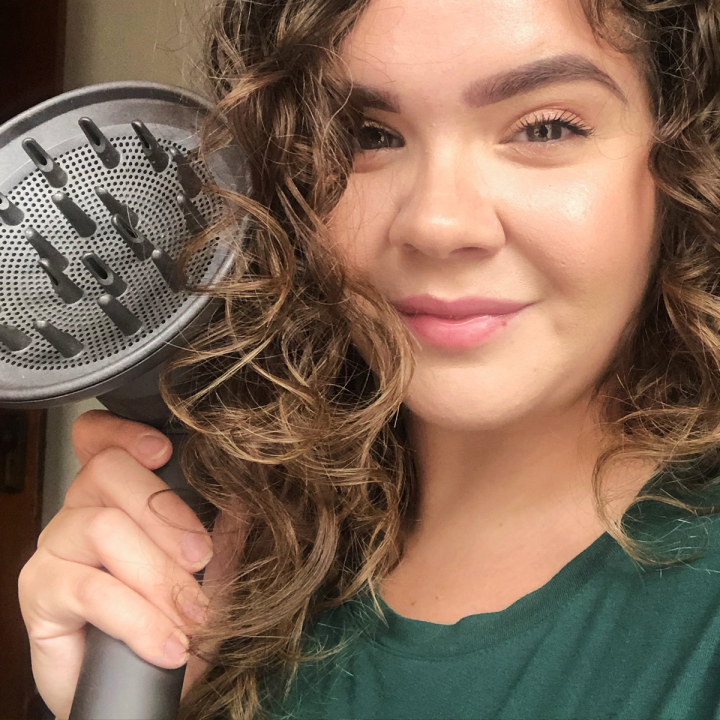
Now you’re ready to start diffusing. Begin by drying the ends of your hair. Use the diffuser attachment as if it was your hand, gently cupping hair in the bowl of the diffuser and softly scrunching the curls from the ends up. Move around your head, working in small sections, spending a few seconds on each section, and moving up toward the roots as you go.
Step 4: Diffuse Upside Down
Once you’ve got some of the moisture out of the ends of your textured hair, flip your head upside down. Diffusing your hair upside down will add volume to your look. Plus, it will allow you to dry hard-to-reach spots in the back of your head and at the roots.
Step 5: Apply a Finishing Product
Once your textured hair is dry, finish your look with our Curl Moisturizing Shine Oil for a boost of shine and moisture. Massage it into your roots to add even more volume to your look. Once you’ve applied your finishing product…voilà! You’re ready to rock your defined curls and hair as-is or have a perfect head of hair to try out in different hairstyles for curly hair.
With the right products and a diffuser, you’ll see more curl definition and curl formation in your hair.
Why Use a Diffuser?
This blow dryer attachment disperses the air so that the heat from the hairdryer is distributed more evenly and gently to your curls. It is typically shaped like a bowl with small cones that catch your curls, helping to support your hair’s natural curl pattern.
Your average hair dryer will not only disrupt your natural curl pattern but also amplify frizz, but when you slap a diffuser on it, you can keep your natural curl formation intact, increase definition, and reduce hair frizz. Plus, without the use of a blow dryer, it can take forever for curls to dry. So, unless you want to leave the house with wet hair, a diffuser is essential for embracing your natural curl.
In addition to keeping frizz at bay and cutting dry time, a diffuser also increases volume. This is especially helpful for curly girls whose curls start more toward the middle or ends of hair and can tend to weigh down the roots. With a diffuser, it’s possible to experience bouncy curls and volume all over for big curly hair.
Using a diffuser can be extremely beneficial for all curly hair types, especially if your curls are unmanageable, inconsistent, or less curly than you’d like. With the tips above, you’ll achieve beautiful, manageable, and tighter curls.
How to Dry Curly Hair Without a Diffuser
While adding a diffuser to your curly hair care routine can be a game-changer, it’s not always an available option. There are ways to dry curly hair without a diffuser. Of course, air drying is the simplest and most straight forward option, but you can also use a normal hair dryer without a diffuser attachment on curly hair if you alter the drying method a bit. You can do this by tying your hair up with a microfiber towel or even a cotton T-Shirt so your curls don’t take the brunt of the heat.
At the end of the day, if you’re serious about styling your curls, a diffuser is an essential investment—and it doesn’t have to break the bank. Learning how to diffuse wavy hair or curly hair is the first step to embracing your natural hair texture and enhancing your curl definition. There are plenty of well designed diffuser attachments you can add to any blow dryer. Then, follow these steps and voilá! Your beautiful, bouncy curls will be back in action.


